HandShaking with Revit

After we got to know what are the possible access to Revit. Lets Implement one.

Create a HandShaking App.

these are the steps we will take in this post, to write our first Revit app.
  1. Setup a dll library Project.
  2. Reference Revit dlls 
  3. Use Revit library in your Class
  4. Decorate your Class with Transaction [for more information about this step see here]
  5. implement Interface
  6. Write your Code
  7. Create a Manifest File 
  8. Security Concerns
  9. Hand Shake with Revit

Setup a dll library Project

We have already explained in a previous My First C# Program how to setup a project. However, that post was for a Console Application. This time we will choose a dll library Project. follow the same steps in the "My First C# Program" post and instead of Selecting Console Application, select  Class Library Project.

You can Set your Project Name anything you want. We will name it "LAI02_HandShaking"

Reference Revit dlls 

Since we need to write an application that communicate with Revit, we need to feed our program with extra information about Revit. Gladly, Autodesk allowed access to Revit through specific dlls. `RevitAPIUI.dll` and `RevitAPI.dll`. These two files can be found here:
[your Revit Installation Folder\RevitAPI.dll]
example: 

  • D:\Program Files\Autodesk\Revit 2020\RevitAPI.dll
  • D:\Program Files\Autodesk\Revit 2020\RevitAPIUI.dll
to reference these two files to our project follow these steps:

  1. Go to Solution Explorer
  2. right click on Reference
  3. Select: Add Reference
  4. Browse for these 2 library files
  5. select both and click on Add.
  6. then Click OK.

for a quick view see this Video.

Since all necessary dll files already exists under Revit folder, It is preferable to set Local Copy to false, this will avoid copying those dll files to your output folder.

Note: adding a reference to you project doesn't mean we are using them. we have to explicitly tell our program to use or to address them.

Use Revit library in your Class

Add using statements to inform our Project we need these library in our project.
```using Autodesk.Revit.Attributes;
using Autodesk.Revit.DB;
using Autodesk.Revit.UI;
```
you can think of these using statements as if you opened a book in a library and kept it open on a specific chapter, so you can easily pick information from.

Decorate your Class with Transaction

above LAI02_HandShaking Class add this decoration
```[Transaction(TransactionMode.Manual)]```
we gave a little bit explanation about what are these decoration in a previous post. but in short, it is required to allow Revit recognize what is the intention of this class is it going to modify the Document or will only Read its contents.

TransactionMode has 2 values. either `Manual` or `ReadOnly`

Implement Interface

Interface is defined by Tutorials Teacher as:
An interface is like a contract. In the human world, the contract between the two or more humans binds them to act as per the contract. In the same way, the interface includes the declaration of one or more functionalities. Entities that implement the interface must define functionalities declared in the interface. In C#, a class or a struct can implement one or more interfaces.~Tutorials Teacher
 with that said you can think of it a list of a must to do list. and like we previously mentioned, it is a requirement to allow Revit recognize this class for accessing. see our Post IExternalCommand is an Access

now move your mouse pointer in your code editor and right click on IExternalCommand, then select Quick Actions and Refactoring...
then select Implement interface.
you can also click on (Ctrl + Period)

now your class should look like this by now:
```[Transaction(TransactionMode.Manual)]
public class LAI02_HandShaking: IExternalCommand
{
    public Result Execute(ExternalCommandData commandData, ref string message, ElementSet elements)
    {
        throw new System.NotImplementedException();
    }
}```

Write your Code

now we are ready to write our first statement. Remove this line
```throw new System.NotImplementedException();```
and write the below
```TaskDialog.Show("HandShaking", "Welcome Professor");
return Result.Succeeded;```
TaskDialog: is a static class library provided by Autodesk and its purpose is to display messages in a window box. it is explained in RevitAPIDoc as
A task dialog is a dialog box that can be used to display information and receive simple input from the user. It has a common set of controls that are arranged in a standard order to assure consistent look and feel.~RevitAPIDoc
and finally your full class.cs file should look like this:
```using Autodesk.Revit.Attributes;
using Autodesk.Revit.DB;
using Autodesk.Revit.UI;

namespace LAI02_HandShaking
{
    [Transaction(TransactionMode.Manual)]
    public class LAI02_HandShaking: IExternalCommand
    {
        public Result Execute(ExternalCommandData commandData, ref string message, ElementSet elements)
        {
            TaskDialog.Show("HandShaking", "Welcome Professor");
            return Result.Succeeded;
        }
    }
}```

Now build your Project, Right click on your Project Name in the Solution Explorer and select Build

Create a Manifest File

A manifest file is like an administrative works. I will detail more about this file in a separate post, but in brief, Since Revit does know nothing about your dll file. Revit API setup a strategy to identify what dll file it should look at. this File is a text file with extension `.addin `containing
```<?xml version="1.0" encoding="utf-8" standalone="no"?>
<RevitAddIns>
        <AddIn Type="Command">
        <Assembly>D:\Dropbox\API Tutorial\LAI02_HandShaking\LAI02_HandShaking\bin\Debug\LAI02_HandShaking.dll</Assembly>
        <AddInId>239BD853-36E4-461f-9171-C5ACEDA4E111</AddInId>
        <FullClassName>LAI02_HandShaking.LAI02_HandShaking</FullClassName>
        <Text>HandShaking</Text>
        <VendorId>arch4hum</VendorId>
        <VendorDescription>Let's API It</VendorDescription>
        </AddIn>
</RevitAddIns>
```
Now copy the above and start any text editor such as NotePad. and past these in. You need to ensure that line 4 is exactly pointing to your Project Location. then Save this file as LAI02_HandShaking.addin to this locaiton
```C:\ProgramData\Autodesk\Revit\Addins\2020\LAI02_HandShaking.addin```
you need to change 2020 to you related Revit version.
Now Start Revit

Security Concerns

starting from Revit 2017 Autodesk add more control on how additional dll libraries are loaded. in that sense the moment you start Revit and recognize your addin/dll file... it will pop up this message.

Click always load, as long as we are the developer of this addin, aren't we? :)


Hand Shake with Revit

click on addinTab, and click on External Tools button, and select HandShaking


by now, you have completed your first Step to integrate with Revit.

My First C# Program

since we had a chance to go through Computer Programming history and had a sight view on how computer language is essential to Revit API. Today we will touch the concept of writing a program, but first let me explain some sort of things.

Wyvern-programming-languages-in-one

What skills I do need to Start Revit API?

In fact, I as well have asked this question long time back. Some of the answers I received was “NO you cannot. You need to be a computer programmer specialist.” others said “Pooh! I think it will take too long time for you to study something out of your career.” - Well if you received the same answers, then drop them all behind. Nothing is impossible, just keep finding your path and you will definitely succeed. Well, I advise beginners to touch the basic concepts of Programming and try to write a very small typical application such as “Calculator”. Once you are happy with that then start crunching your head with Revit API. in this post we will take you to write your first program.

For now I need you to install an IDE please visit our Post for installation guideline.

Project Types

There are many applications around the world, that we are using daily. Web, Windows, Library, Android... etc applications. For example the webpage you are reading now is a web application. in order to create your first program you need to know what type of application you will write as well as what language. A quick helpful definitions

Console Application: 

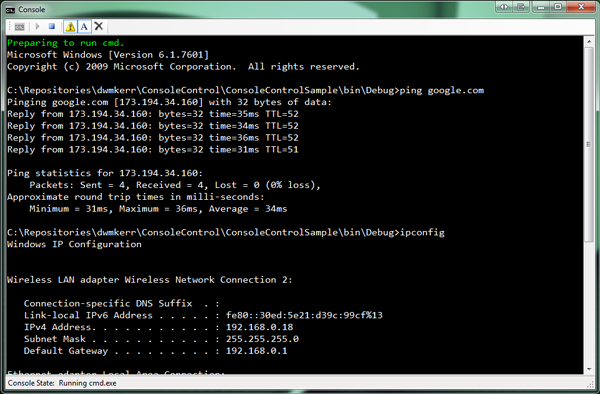
It is a application that only deal with text. input from user, and output from the computer. we will use this type in our today's tutorial.
Defined in techopedia as:
A console application, in the context of C#, is an application that takes input and displays output at a command line console with access to three basic data streams: standard input, standard output and standard error.
A console application facilitates the reading and writing of characters from a console - either individually or as an entire line. It is the simplest form of a C# program and is typically invoked from the Windows command prompt. A console application usually exists in the form of a stand-alone executable file with minimal or no graphical user interface (GUI).

Windows Application: 

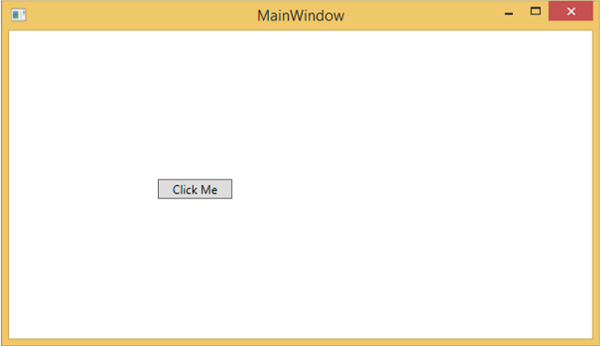
is any application that uses the Window `GUI`
A program that is written to run under the Microsoft Windows operating system, also called a "Windows app." All 32-bit Windows applications run in the 32-bit and 64-bit versions of Windows. All 64-bit applications require 64-bit Windows, which is the standard on new Windows computers and tablets.~PCMag

Dll Library:

Dll is an abbreviation for a Dynamic Link Library. you can say it is like a book where you give your computer the required knowledge to compute and gives back a result. A very good Explanation is here The Tech Terms Dictionary We will mention about it again in this post.

Let's setup our First Program:

Start your Visual Studio and click on create new Project
Now Select your Project Type. 


for the purpose of this tutorial we will select Console .NET Framework
Set your Project name, and Folder Location


and Finally you will reach to the below image. Up to here we are now ready to write our program. lets understand this interface first:

Visual Studio User Interface:

The Code editor is where you write your code.
The Solution explorer shows the files you’re working with.
The Properties pane gives additional information and context about selected parts of your project.
The Output window displays debugging and error messages, compiler warnings, status messages, and other output.
for more information about `VSUI`, see here 

Before Writing any Program, there are some concepts you need to be aware of these concepts:
Namespace, Class, EntryPoint.
there are a lot of useful information in different websites, for the Namespaces, and classes. already linked above, but I will write it in my own way, may be it deliver a better perspective.

Let me tale you a story which will get things and idea more clearer to you.
I decided to write a book about my first Architecture project. My book will require papers of size A3 and A4. I went to my desk, and picked 5 A4 papers and 2 A3 papers, then  I started writing. During writing, I realized that i need to Reference more information about projects done by others. Since, these references are not mine, I add a reference at the footnote. To make my book understandable, I added a note to readers "You need to read the first page before reading the rest of the book". Finally, I did finish writing and used all the papers. I then bound all the papers with a hard Cover and title my book as "My First Project".
 now lets translate that to Computer World:
Story argument C# argument
Hardcover Namespace
book Title Namespace Name
My book will require papers of size A3 and A4 2 class types A4 and A3
picked 5 A4 papers and 2 A3 papers Create 5 instances of A4 class and 2 instances of A3 class
read the first page before reading the rest Entry Point
add a reference at the footnote Link/Add Libraries to your Project

Namespace

is a boundary to your program, that contains all the required classes to run the program. They can be nested, meaning a namespace under namespace. They also must have a name and the name must not start with digits or hyphen
```namespace MyBook
{
//some classes will be defined here
}
```

Class

is a template that you can instantiate objects from. like A4 paper is a class, but we instantiated page 01,02----05. basically, a class must have a name and the name must not start with digits or hyphen. class is a container of properties that describe an instantiated object. for example, a typical A4 paper has the following properties width, height, back Color, paper type ...etc you can add properties as much as your program needs. 
```public class A4Paper
{
public double Width=21;
public double Height=29;
public Color BackColor=Colors.White;
}
```

Entry Point:

Any computer program must have a starting point and end point. it is like pressing the power button to run your PC and closing it when you are done. Entry Points differs depending on the type of the Application. since our discussion today is about Console Application then the entry point is
```static void Main(string[] args)
{
}
```
You can't change the entry Point to something else, otherwise, the application will keep looking for the `Main(string[] args)` method, and then crash.
Application startup occurs when the execution environment calls a designated method, which is referred to as the application's entry point. This entry point method is always named Main...~C# specification

Now lets start writing our first Program.

We need an application that calculate the volume of a sphere when we advise it with a radius.
let's break the above:
Does the computer know anything about what a ball is? NO
Does the computer know anything about calculation in specific Volume? NO

Your application knows nothing because you feed it with nothing. so we have to do the following:

  1. Create a class Name: `Ball`
  2. Add a double property Name: `Radius`
  3. Add a double property Name: `BallColor`
  4. Add a method `double GetVolume()`
  5. Go to entry Point.
  6. Instantiate your a ball class.
  7. Assign the new ball variables
  8. Call `myball.GetVolume();`
And your Program should be like this:
```using System;
using System.Drawing;

namespace LAI01_BallVolume
{
  //this is a class that contains information about a typical Ball.
  public class Ball
  {
    public double Radius;
    public Color BallColor;

    public double GetVolume()
    {
      return (4 / 3) * Math.PI * Math.Pow(Radius, 3);
    }
  }

  public class Program
  {
    private static void Main(string[] args)
    {
      //this is the entry Point of the Program
      var myBall = new Ball();
      myBall.Radius = 4;
      myBall.BallColor = Color.Red;

      Console.WriteLine($"Your Ball {myBall.BallColor} has a Volume of {myBall.GetVolume()} CubicMeter.");
      Console.ReadLine();
    }
  }
}```

Points to Attention:

This program structure would look like this:


What is Additional Library:
Like we mentioned before, Computer, as a digital device, doesn't know anything unless you started feeding it with information. Under the scope of this application, computer doesn't know anything about:
  1. Math.PI
  2. Math.POW(..,..)
  3. Color.Red
  4. Console.WriteLine(....)
This information is located in another Library Files:
  • System.dll and
  •  System.Drawing.dll...
All dll Libraries are placed in Reference Section.

Methods:
are containers of Code Statements. Methods must have a name. Name must not start with a digit or Hyphen. for example the Get Ball Method. Read more about Methods here.
Methods optionally returns something and parameters. like the example above GetVolume() returns double, but has no Parameter
```public double GetVolume()
{
  return (4 / 3) * Math.PI * Math.Pow(Radius, 3);
}```
Method Signatures:
You also noticed `static` and `public` signatures. `public` is used to allow calling outside its boundary. in this program you have a Ball Class and Program Class. in order to allow classes call methods/properties of other classes, public signature must be provided.

we will discuss static in another post.

Installing IDE

In the last 3 Posts, we explained what is API, some information about UIApplication, and finally What is IExternalCommand. in this post we will explain how to install IDE.

Install an IDE

Integrated Development Environment (IDE), is a program that assist developers to generate different types of applications. There are many IDE available in the market where some are free. I will use Visual Studio 2019 community Version (which is free of use, but limited to some features).

IDE Pre Setup Configurations:

Depending on your Revit version you are using to develop your plugins, it is deemed necessary to install the right package of .NET versions or higher version. 

Revit 2018 : NET 4.5.2
Revit 2019 : NET 4.7
Revit 2020 : NET 4.7

I will be using Revit 2020, Windows 10.

Download Visiual Studio IDE from here
After Downloading and starting the installation, you will get to this page. ensure you select those marked in Redbox
Installation WorkLoad Page

Installation Individual Package Page
Most likely, you will need to restart your computer.

see you on a next Post

Revit API Access

Revit API has two ways of access, either via a IExternalCommand or Via IExternalApplication calling the a IExternalCommand class.

Let's start with IExternalCommand

IExternalCommand

Your starting point to instruct Revit by what to do in a document is this class. It is your starting point to add your core code in. But remember this class must be shaped/decorated in a way it allows Revit understand it, and that is called interface.

When you Start opening Revit, Revit starts looking for any available IExternalCommand and IExternalApplication Classes that can be executed, but to ensure everything fits perfect, it checks if the class implement a specific interface or not. if yes, then such a class is accepted to allow this code log into Revit World, else it will be ignored.

You can think of this like your USB stick, your USB stick size/shape/pins must exactly match the port in the PC, otherwise no connection will occur.

as an example of implementation:
```[Transaction(TransactionMode.Manual)]
public class Command: IExternalCommand
{
  public Result Execute(ExternalCommandData commandData, ref string message, ElementSet elements)
  {
    // your code will be here
    return Result.Succeeded;
  }
}
```

Well you can see and notice there are some new terms that may be you are not aware of yet, but no worries, all will be explained in due course.

But as an abstracted definitions:
Transaction
`[Transaction(TransactionMode.Manual)]` this is called attribute for a class, and basically it is like some additional information on how do you want revit interact with it. `Transaction` generally as defined in wiki:
is information processing in computer science that is divided into individual, indivisible operations called transactions. Each transaction must succeed or fail as a complete unit; it can never be only partially complete.
and RevitAPIDoc
Any change to a document can only be made while there is an active transaction open for that document. Changes do not become part of the document until the active transaction is committed . Consequently, all changes made in a transaction can be rolled back either explicitly or implicitly by the transaction's destructor.
To make it easier, It is to tell revit: Hey Revit! Please pay attention to this class as there may be some changes to the current opened Document, and I need the `Manual` Mode option. so basically, don't worry about when to open and close the transaction, I am good enough to handle it myself.

We will talk more about transaction in other posts but for now you need to know that we must decorate our class with this attribute in order to get our addin works.

IExternalCommand
this is what this post all about.

Result
is a signal that return back to revit confirming back to Revit how was your addin performed, did it run and finished successfully or not. it has three values
Succeeded, Failed, Cancelled.

It is your (as a developer) responsibility to feed revit back, how your application performed.

and finally a full class.cs file would look something like this:
```using Autodesk.Revit.Attributes;
using Autodesk.Revit.DB;
using Autodesk.Revit.UI;

//Let's API It
namespace LAI
{
  [Transaction(TransactionMode.Manual)]
  public class Command: IExternalCommand
  {
    public Result Execute(ExternalCommandData commandData, ref string message, ElementSet elements)
    {
      try
      {
        // Do something on Revit
        return Result.Succeeded;
      }
      catch(Exception ex)
      {
        // There is a problem in my code
        return Result.Failed;
      }
    }
  }
}
```
The target of this post is to cast some shadows on what is the IExternalCommand and how it is implemented. That's it for now, in the next post we will talk about how to setup your program to get connected to Revit, and create your 1st addin.

Acknowledgement

I have been requested by many colleagues and Revit users to write down a blog on some basics of how to implement Revit API using C# but in a very very simple way targeting those who are newbie in programming. in fact, I would see this is a good idea to record my findings, and get Users on the track to be more aquatic to programming. I would like to thank those who helped me to improve my knowledge in the programming field as well as using Revit. additionally thanks for my wife and my children who allowed me to spare some time writing this blog.

I would be so glad if there are updates/Corrections/New way of implementing things to my my posts, shared from reader. sharing information is the main reason this blog is raised.

It worth mentioning I wouldn't be able to write about Revit API, without the extreme support of knowledge provided via these 2 web sites, Building Coder, and RevitAPI Forms

What is API

Prolog

As a start for all newbie in programming, I will try to simplify as much as I could what Revit API is and the concept behind its implementation.

Let me explain What is API through a story. let's say you you have a car and the car needs maintenance, but you know nothing about car maintenance. so how you would fix this. logically, you would go to a garage asking the Mechanical Engineer for a fixation. the Mech. Eng. would start opening the hood doing a maintenance and then back to you saying your car is ready.
so the analogy of this we can say:

You : User
Mech Eng.: Interface.
Car: Application

So we can say you have interfaced you Car through a Mech. Eng. to apply a function (maintenance).

But, what if you asked this Mech. Eng. to create a button on your display panel, that boost your car.
and that is called additional feature. Turning this to Computer Science World, that is called API. It is like sending a request message to an application to do something and return back to you with the result.

WikiPedia defined API as

An application programming interface is an interface or communication protocol between different parts of a computer program intended to simplify the implementation and maintenance of software. An API may be for a web-based system, operating system, database system, computer hardware, or software library. Wikipedia
API infographic
A graphical explanation of how API works ref:govTech

Conclusion

with that said, I guess it is now more clear what API is, which if reflected on Revit, it would be defined as an application that will trigger functions already implemented inside the hood of Revit, to do what it is allowed to do to serve our needs.

In short, your role would be similar to the Mech. Eng. who writes API application to connect a user to Revit.

see you on a next post.

API Entry to Revit World

As we got to know what is API, lets understand how to implement communication between User and Revit.

of course saying let's implement something needs some basic understanding, like translating what a statement points to on Revit. What is Document, and what is UI Document. What is Application, and Transaction.... you don't have to worry about all these terms... gradually you will get know how things works. but in order to be fully familiar with Let's API It you need to have a basic understanding of programming, specifically, Object Oriented Programming (OOP).

UIApplication

UIApplication is the root container of everything in Revit. First you need to think of the computer way of work is like a train. A train moves on rail till it reaches its final destination. and the final destination of a computer work is terminating the application.

See how RevitAPIdoc identify it
Represents an active session of the Autodesk Revit user interface, providing access to UI customization methods, events, the main window, and the active document.  You can access documents from the database level Application object, obtained from the Application property. If you have an instance of the database level Application object, you can construct a UIApplication instance from it.  ~RevitAPIDoc

this is our guy, the Revit Application, which its definition in API is UIApplication. so let's brainstorm your thoughts... What functions expected to be found in this class UIApplication?
...
..
.
Well your guess would be right if you thought of Open/Close Projects/Families..etc. but definitely uiapp has a lot of functions to do. and going through them all we will write millions of posts to cover it all. however, we will keep visiting uiapp through this blog on the necessity to do something.

for now you need to know this is the UIApplication.

but the question could be how on earth i as individual, get an access to tell Revit show me all your mighty?
Machinedesign Com Sites Machinedesign com Files Uploads 2015 02 Usb 1
Googled Image
That is exactly what you need to start to think of "an Access". you need to be aware, that the owner of any Program, if there is a will to let users access their core program function, then there must a design considered for this. meaning there would be no API if originally the application is not designed for that.

Thanks Autodesk for allowing us to do our job the way it suites our needs. you can think of it like the USB Port in your PC. if there is no Port for USB you will never be able to access your USB stick.

I will explain in detail how you setup this access, in another post. but first I need to setup some basic understandings before we start our engine. so please be patient.

What you should also be aware of for now, once Revit starts and loads its Window interface, it starts looking for any available IExternalCommand and IExternalApplication Classes that can be executed. you can think of these two classes as the USB pins, if they match what Revit is looking for, then we have entered Revit World. and as a start Revit instantly sends, its first gift to you, an object called UIControlledApplication.

UIControlledApplication 

This is an argument sent from Revit when it successfully get connected to a new addin. It contains very minimal information, but enough to take you inside and setup your program. it allows you to add an icon/Button to your application. when to show your button and when not. additionally some very useful events such as Idling. again we will explain more about these methods and events by time.

RevitApiDoc defined it as
Represents the Autodesk Revit user interface, providing access to UI customization methods and events.This class does not provide access to documents because it is provided to you through the ExternalApplication OnStartup()/OnShutdown() methods, and those methods are when it is not possible to work with Revit documents. You can work with documents by getting them from the UIApplication class; that class is obtained from events and ExternalCommand callbacks. ~RevitAPIDoc
 well that's it for now. the next post we will talk about how to setup your program to get connected to Revit.

Add Filter to your Selection

As pointed out in Select Element post, selection Filter, is adding a filter to avoid picking unnecessary elements. for example, if you are dragging a window selection to select only walls, ISelectionFilter interface comes in handy for this purpose.

More details about ISelectionFilter:

ISelectionFilter is  an interface class that holds a specific methods to be implemented and to match your needs. it contains two methods, AllowElement() and AllowReference().

AllowElement()

it is a boolean function that tells revit back if this element is allowed to pass this filter or not. Meaning the story starts when a user start moving mouse pointer over an element, this function is called sending in the element. the element is then passed to some condition we as API user specify.
see this example if i want to select only Windows from this project:
```public bool AllowElement(Element elem)
{
   return elem.Category.Id.IntegerValue == (int)BuiltInCategory.OST_Windows;
}
```

AllowReference()

this is the second method in this interface. It is an additional filter but for ElementReferences. it is targeting geometry Type such as edge, face, GeometryObject...etc it comes handy at the time you need to specific or generally pick edges. for example see the below snippet:
```public bool AllowReference(Reference reference, XYZ position)
{
  return reference.GeometryObject is Edge;
}```

How to implement this class

  1. first create a new class and give it any meaningful name such as WindowSelectionFilter.cs
  2. beside the class name add :ISelectionFilter
  3. implement the interface
  4. now you would see the above two mentioned methods are generated
  5. type as described above.
  6. that's it, now in your PickObject statement add a new instance of this class
and this is an example on how the implementation would be:
```public class WindowSelectionFilter: ISelectionFilter { public bool AllowElement(Element elem) { return testElement.Category.Id.IntegerValue == (int)BuiltInCategory.OST_Windows; } public bool AllowReference(Reference testReference, XYZ testPosition) { return testReference.GeometryObject is Edge; } } ```
and the usage would be like this
    ```uidoc.Selection.PickObject(ObjectType.Face, new WindowSelectionFilter(), "Select a Window edge");
    ```

    Select an Element

    How to select or virtually "pick" an element from Revit Graphical View.

    There are numbered of choices that gives a user the variety of options to select an object. I have combined all of them below.
    ps. this is only for the picking single object we will talk about Multiple Object in the next Post

    List of Methods: [copied from revitapidoc.com]
    Method A:
    public Reference PickObject(
     ObjectType objectType
    )
    
    Method B:
    public Reference PickObject(
     ObjectType objectType,
     ISelectionFilter selectionFilter
    )
    Method C:
    public Reference PickObject(
     ObjectType objectType,
     string statusPrompt
    )
    Method D:
    public Reference PickObject(
     ObjectType objectType,
     ISelectionFilter selectionFilter,
     string statusPrompt
    )

    How does it work?

    Upon this statement is triggered, Revit is turned into Selection Mode waiting for a user to select an element. but the question is: what if user did not need to pick an edge, face ...etc. Well, this is the role of `ObjectType` parameter. `ObjectType` directs what exactly you want to pick from Revit. It has seven different directions of selections:

    Nothing: Nothing.
    Element: Picks a complete element, such as wall, floor, window, group...etc
    PointOnElement: Any point on an element (on a face or curve).
    Edge: Any model edge.
    Face: Any face on any element.
    LinkedElement: Elements in linked RVT files.
    Subelement: Whole element or sub-element.

    After picking an object a ReferenceObject  to the selected element is returned. You can consider ReferenceObject as an address. Think of it like you are staying in your room that is in your house or apartment,  that in your district....and so on. Finally, in order to contact you I need an address.

    ISelection Filter

    If you noticed on Methods B,C,D there is a parameter named `selectionFilter`. basically you are adding a condition to what categories (for example) are allowed to be select, any other element that is not a part of this list will be ignored. Read more about ISelectionFilter

    statusPrompt

    It is a hint to user to let him know what exactly he should search for and select. see this GIF 

    How to use it?

    As mentioned above there are 4 ways to pick an element from Revit. Example of usage like below:
    Method A:
    ```uidoc.Selection.PickObject(ObjectType.Element);```
    Method B:
    ```uidoc.Selection.PickObject(ObjectType.Element,new windowFilter());```
    Method C:
    ```uidoc.Selection.PickObject(ObjectType.Element,"Please select Window Only");```
    Method D:
    ```uidoc.Selection.PickObject(ObjectType.Element,new windowFilter(),"Please select Window Only");```
    `uidoc`: is the User Interface Document, basically it is everything related to GUI for the current project

    What requisitions i should consider?

    We need to be aware that picking an object doesn't require opened Transaction. Since we are not modifying Document. we will talk about Transaction in another post.
    It is always better to encapsulate this statement in a try catch method, since user might cancel the selection operation by press escape key, and by then an exception will be thrown.

    And finally your method will look similar to this:
    ```try
    {
      var referenceElement = uidoc.Selection.PickObject(ObjectType.Element, new Room_Filter(), "Please select a Room");
    }
    catch (Exception ex)
    {
      //User canceled selection
    }```
    I hope the above gets you started.

    Troubleshooting:

    WPF-Revit -01

    In this post, we are going to surface explore WPF structure and how to use it within Revit App. Windows Platform Foundation WPF ...