In this post, we are going to surface explore WPF structure and how to use it
within Revit App.
~Microsoft
So you can say WPF is another way of showing graphical interface to users from what we used to know as Windows Forms. The main reason behind creating this
development is to adapt the scale of the Graphical Contents (Button, Images,
Bars,...etc) to the various Monitor dpi. Nevertheless,
Windows Platform Foundation WPF
Windows Presentation Foundation (WPF) is a UI framework that creates desktop client applications. The WPF development platform supports a broad set of application development features, including an application model, resources, controls, graphics, layout, data binding, documents, and security. The framework is part of .NET, so if you have previously built applications with .NET using ASP.NET or Windows Forms, the programming experience should be familiar. WPF uses the Extensible Application Markup Language (XAML) to provide a declarative model for application programming.
~Ref
- WPF has the ability to separate UI from logic effectively.
- WPF has an inbuilt storyboarding feature and animation models.
- Data binding is very much better than with the WinForms application.
- WPF allows you to handle large data sets because it has a built-in 'user interface virtualization feature.
- WPF offers data and control templates that provide flexible modeling of UI on data models.
- WPF supports 3D graphics to make UIs look really special.
- WPF supports various types of media such as video, 3D content, and animations.
- Even if Visual Studio designer is not available, you can code in XAML (Extensible Application Markup Language).
WPF Structure
WPF is relaying on separating all the processes from the user interface.
Something like the download progress... if you are downloading a large file from the internet, your application interface needs to be responsive to the user, then blocked, while waiting for the download to be finished. the key thing to make this workable is MVVM Pattern.
MVVM Pattern
MVVM is an abbreviation for Model - View - ViewModel.
Model:
is a representation for the actual data/Information. any changes to a property
of this Model, will be reflected the View Layer, only if this property has
a Notification.
View:
this is related to what the user will see and interact with, such as buttons,
window, textbox....etc.
WPF user interface is divided to parts XAML, and Code Behind.
XAML stands for Extensible Application Markup Language. It’s a simple and declarative language based on XML. In XAML, it very easy to create, initialize, and set properties of objects with hierarchical relations. It is mainly used for designing GUIs, however it can be used for other purposes as well, e.g., to declare workflow in Workflow Foundation. ~tutorialPoint
it worth mentioning, it is not a must to learn XAML to Create a WPF
Application. you can use Code behind to create the content of a WPF interface.
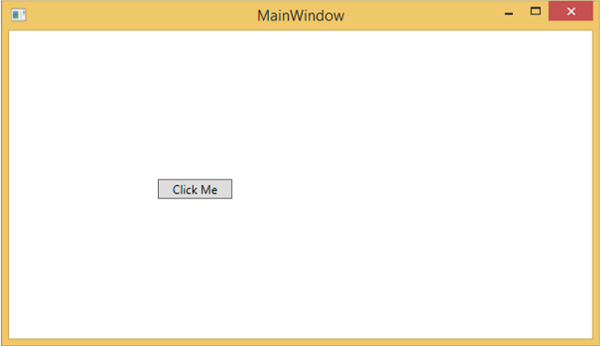
see this example that exactly do the same result:
```<Window x:Class = "WPF_Revit.MainWindow"
xmlns = "http://schemas.microsoft.com/winfx/2006/xaml/presentation"
xmlns:x = "http://schemas.microsoft.com/winfx/2006/xaml"
Title = "MainWindow" Height = "600" Width = "800">
<StackPanel>
<Button x:Name = "button" Content = "Click Me"
HorizontalAlignment = "Left" Margin = "150" VerticalAlignment = "Top"
Width = "75" />
</StackPanel>
</Window> ```
and Code Behind C# language will look like this
```using System.Windows;
using System.Windows.Controls;
namespace WPF_Revit
{
/// <summary>
/// Interaction logic for MainWindow.xaml
/// </summary>
public partial class MainWindow : Window
{
public MainWindow()
{
InitializeComponent();
// Create the StackPanel
StackPanel stackPanel = new StackPanel();
this.Content = stackPanel;
// Create the Button
Button button = new Button();
button.Content = "Click Me";
button.HorizontalAlignment = HorizontalAlignment.Left;
button.Margin = new Thickness(150);
button.VerticalAlignment = VerticalAlignment.Top;
button.Width = 75;
stackPanel.Children.Add(button);
}
}
}```
In fact, XAML will speed writing, for example, Creating a button in XAML is one line of code against 7 lines in C#. but all in all, it is all up to the
developer to chose what fits best to his development.
ViewModel:
this is the medium between the user interface (View) and the (Model). and usually used as the DataContext for the view. ViewModel is where all the
logic and operations are executed, reflecting the results to the Model and the
Model triggers a Notification Change to the ViewModel, so to push the updates to the View. see the below sketch to clarify more.
in the next post, we will explain how to use the above in Revit. see you then.
 ~
~
No comments:
Post a Comment